How does motion capture effect the future of animation?

Motion Capture is a distinct form of animation that has come far from its debut in 1915 to the modern day with much more room for improvement and progression.

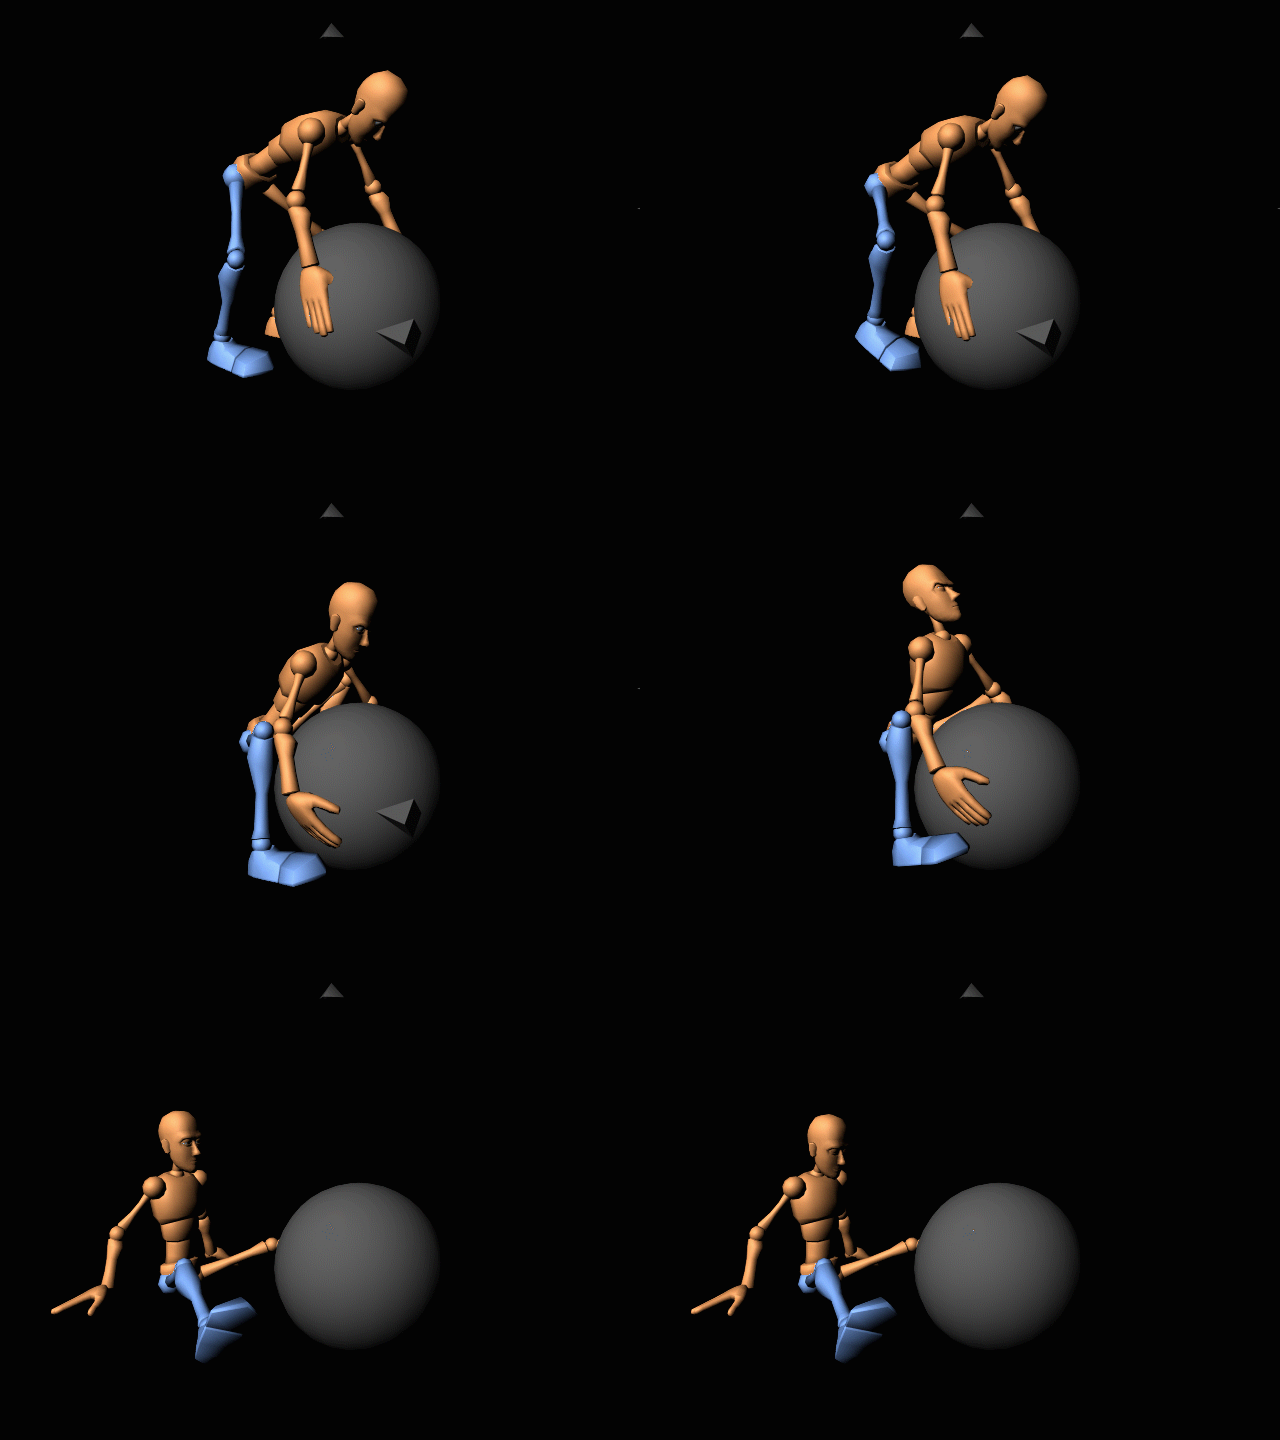
Motion Capture animation uses a set of cameras to record the movement of the actor. Often using a mocap suit (A suit with markers for the camera to track) to help in the recording.

The recording is then used on a 2D or 3D character which the computer will animate to simulate the recording.

Mocap could quite easily be compared to the older animation of rotoscoping as seen in  Disney’s Snow White (1937) Which used stop motion to emulate a smooth, human like movement in the characters animation.

In Comparison to the modern examples of motion capture such as Planet of the Apes (2017) in which the method is used to create animation that is indistinguishable from reality. It is evident that Motion Capture animation has come a long way, but what does that mean for other forms of Animation?


While motion capture is an extremely efficient method to imitate realistic movement it is not uncommon to use manual forms of animation to polish the animation. Furthermore, assuming realism isn’t the desired effect then perhaps manual animation is better overall. Manual animation offers a unique aesthetic to the media it is applied to, making them appealing and eye-catching to a wide-range of audiences. A good example of a modern game becoming popular due to its creative application of manual animation is the game Undertale (2015) Which gained an extensively large fan-base due to its distinctive style.

There are many different styles of manual animation such as Clay Animation, Puppet Animation, Stop Motion and more and there are just as many 2D CGI based animated movies that give themselves a distinct, unique and memorable animated style. Mostly used in children’s movies to create an exaggerated style of animation such as in Toy Story (1996) or the The Incredibles 2 (2018)


Stop-Motion is a form of animation in which objects are moved slightly with each frame creating an illusion of independent movement when the frames are played in quick succession. Stop-Motion is a widely known and accessible method of animation being used in the simplest of animations. While Stop-Motion is not used as directly anymore a lot of modern animation styles use the similar premise such as Clay Animation used in things such as Chicken Run (2000) or Puppet Animation such as Coraline (2009)


Another method of manual animation is in CGI or Computer Animation.

Computer Animation usually consists of two methods. Those being Stop-Motion or Point to Point animation. Stop-Motion CGI uses the same methods as mentioned in Stop-Motion before. Point to Point is a similar premise however only certain frames are specifically created and the computer fills in the gaps. These methods are used for both 2D and 3D CGI however 3D Animation introduces the use of a rig which is similar to that of the meshes skeleton which the computer will use to determine the parts of a meshes specific parts during an animation.


These methods of Animation allow the animators to create motions without the limitations of realism or physics. This benefit is often seen in Children’s/Family movies due to the access of techniques such as squash and stretch which cannot be created in Motion Capture as well as more extreme animation. The lack of physics and realism requirements also allow the methods to be used in Fantasy or Fiction movies to animate non-humanoid creatures or characters such as dragons in the Game of Thrones series.


While these forms of animation offer the benefit of less limitation they also have more room for mistakes and errors. Stop-Motion is a time consuming method as you have to alter the object’s position for each individual frame of the motion. Manual CGI is also time consuming and depending on the method use the computer might deform the mesh during the Point to Point animation process.


Motion Capture (Sometimes known as Performance capture) outshines Manual animation in a variety of ways allowing the animators to create a smooth and realistic movement within their character. While Motion Capture animation is used in both movies and games I believe games present it’s capabilities, benefits as well as flaws much more clearly than that of a movie due to the different types of rendering.


Mocap could quite easily be compared to a more developed version of rotoscoping which was used to create old animated disney movies such as Cinderella and Alice in Wonderland, it was even used for anime movies such as The girl who leapt through time. Rotoscoping uses the similar method of recording the movements of an actor and copying it to the character. However, rotoscoping requires someone to trace each frame of the recording whereas motion capture will be animated by the computer.


While Mocap was attempted in earlier games, the first game to use true motion capture was an early 3D game arcade game (possibly one of the first) Virtua Fighter 2 (1994). Virtua Fighter 2 was praised heavily for it’s graphics. Motion capture has clearly improved since the release of Virtua Fighter 2 as seen in the modern remaster of Resident evil 2 (2019) which utilises an eye-catching, realistic style of animation and in comparison to Virtua Fighter 2 it displays the progression of motion capture in games.


Mocap is capable of easily capturing secondary actions and recreating complex movements in an easy and realistic manner. Due to the animation being mostly automated aside from animators possibly polishing it through traditional methods, Mocap as a lot more efficient in both performance and cost.

“Nothing to do with 3D animation is cheap, motion capture included. But, like anything digital, prices have come way down as of late. On the low end of the scale, you or I can do markerless motion capture at home with a Kinect and iPi Motion Capture software for $295. On the other end of the scale, EA’s new Capture Lab (pictured below) covers 18,000 square feet, and uses the latest Vicon Blade mocap software and 132 Vicon cameras. We don’t know exactly how much that cost them, but a two-camera Vicon system with one software license is $12,500. (Bear in mind that you’ll also need software like MotionBuilder to map the capture data to a character, which runs about $4,200 per seat.) Despite those prices, doing motion capture reportedly costs anywhere from a quarter to half as much as keyframe animation, and results in more lifelike animation.”


Motion Capture can be used in a variety of situations such as underwater though it is much harder to capture underwater due to the reflectiveness and distortion of the water making it difficult for the camera’s to trace the location of the markers or for facial animation (In which case it is often called Performance capture) To capture the more complicated motions in a human face to capture higher ranges of emotion as well as make the character feel more organic and real.


Originally, motion capture was used solely to animate humans while the animation of animals would performed with traditional, manual methods such as CGI. However, overtime motion capture became accessible for animals as well. Allowing smooth, realistic animations of animals without undergoing the time consuming process of manual animation.


An example of Motion Capture animation taking over for CGI animation is in the Harry potter series.

Originally Characters such as Dobby or Kreacher would be represented by sticks or statues (if represented at all) to be placed into the scene through CGI later, leaving the actors to react to nonexistent elves though overtime they began to animate the elves through the use of mocap making the job not only easier on animators but actors as well.

Though, this didn’t remove CGI entirely. Still being used to develop thing such as the Troll, Grawp, Thestrals and more.


It could be said that Motion capture is not only used with animation but also has begun to be implemented as a gameplay aspect by things such as Playstation Move or Xbox Kinect in a method called Positional Tracking. While they do not work exactly the same. They follow the same premise of using a camera to capture and record the motion of a human actor Playstation move even using an LED light as a tracker similar to the markers on a mocap suit. In some games the tracked motion is represented on an in game character using the movements of the player to animate them though in most cases these animations are broken and buggy.

A good example of motion capture being used as a gameplay aspect is in the popular Just Dance series not only uses motion capture as its animation style but also tracks the movements of the player as an essential aspect of it’s gameplay.

Positional tracking is also an essential aspect in things such as AR or VR following the same aspect of using a camera to track the motion and position of the VR headset. This method of head and eye tracking is crucial to the device as it allows the device to determine the position of the user’s head which will be used when altering the players field of view to suit where they are looking.


A great example of facial performance capture with in games is in Injustice 2 (2017) which was widely praised for its incredibly realistic facial animation which was most visible in the character Harley Quinn due to having more exaggerated facial expressions.

While facial performance capture is highly impressive and realistic. It can sometimes create abnormal facial expressions causing the Uncanny Valley effect which was prominent in the game Until Dawn (2015)


As well as creating the Uncanny Valley effect in Facial Performance capture. Mocap also restricts the animation to being extremely realistic. Physic defying actions such as double jumping cannot be captured to a realistic standard. Furthermore. Unique character models and meshes can restrict how well they can be animated with motion capture for example a character with exaggeratedly large hands or can’t be animated with motion capture due to having an inhuman design.

For this reason most developers will choose to use the faces of a characters actor to prevent errors in the characters facial animation, for example in the upcoming game Mortal Kombat 11 the revealed character Sonya Blade has been voiced by and modelled after the popular female WWE wrestler Ronda Rousey. This capability not only allows the developers to have a direct reference to a character’s facial structure and movements but also allows a convenient way to implement celebrity endorsement in their games, encouraging players to purchase the game on account of a celebrities appearance within it.


Motion captures convenient way to make animating a character model much easier while also applying celebrity endorsement is most often seen in Sports games such as the WWE or UFC series which use characters based entirely on real celebrities involved with said sport even using them as the cover image for their games. While this form advertising isn’t created by Motion Capture, the animations the style of animation definitely makes it much easier to accomplish as it allows developers to make their characters look and act just like the real person would.


Overall, I believe that while Motion Capture animation has definitely grown and come to a point where it can be considered much better than that of Manual animation, even being used for much more than just animation but as well as an important utility to consoles in the form of positional tracking which borrows the same method of having a camera track an external actor through the use of a marker. it may not entirely replace Manual Animation due to its limitations. Often animators will use a mix of the two methods, using Manual techniques to polish Motion Capture. Both methods have their pros and cons and most consumers don’t actually have a preference on which animation style is used within the Movies or Video game they watch/play.


Bibliography:

IGN. 2014. A BRIEF HISTORY OF MOTION-CAPTURE IN THE MOVIES. [ONLINE] Available at: https://uk.ign.com/articles/2014/07/11/a-brief-history-of-motion-capture-in-the-movies. [Accessed 16 February 2019].


Motion capture – Wikipedia. 2019. Motion capture – Wikipedia. [ONLINE] Available at: https://en.wikipedia.org/wiki/Motion_capture#Facial_motion_capture. [Accessed 01 March 2019].


Animation – Wikipedia. 2019. Animation – Wikipedia. [ONLINE] Available at: https://en.wikipedia.org/wiki/Animation#Traditional_animation. [Accessed 01 March 2019].


Engadget. (2014). What you need to know about 3D motion capture. [online] Available at: https://www.engadget.com/2014/07/14/motion-capture-explainer/ [Accessed 10 Mar. 2019].


En.wikipedia.org. (2019). Virtua Fighter 2. [online] Available at: https://en.wikipedia.org/wiki/Virtua_Fighter_2 [Accessed 12 Mar. 2019].


En.wikipedia.org. (2019). Positional tracking. [online] Available at: https://en.wikipedia.org/wiki/Positional_tracking [Accessed 14 Mar. 2019].
Synoptic Project:

Pre-Production

Phase 1:

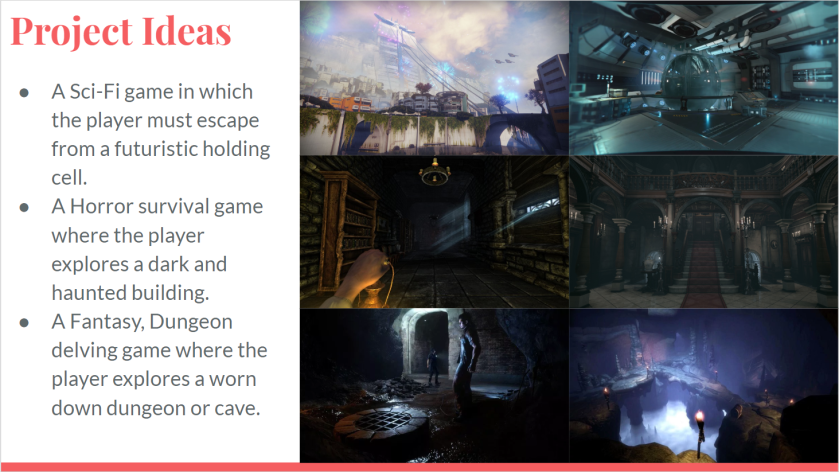
For my synoptic project I had a variety of ideas of what my end product could be such as:

  • A Sci-Fi game in which the player must escape from a futuristic holding cell.
  • A Horror survival game where the player explores a dark and haunted building.
  • A Fantasy, Dungeon delving game where the player explores a worn down dungeon or cave.

CheckerTrade

These varying ideas all had their own appeals. However, I ultimately chose to pitch the Sci-fi game. The science fiction setting was chosen as I felt it would best demonstrate our creative and technical skills. With lots of visual effects, particles, emissive lighting and eye catching scenery.

Mum

The game would take a more realistic approach in style and with a variety of Sci-Fi games utilizing the same style we have a large number of references and inspirations from movies and games. However, the major references would be:

  • Destiny.
  • Star Wars.
  • Portal.
  • Alien.
  • Mass Effect.
  • Halo.

Related image

I researched the Sci-fi genre to see where its strengths lie and what target audience it would most likely appeal too and through such research I found that the genre has a very wide target audience, a good example of this is Portal 2 which appealed to all ages and was often praised as a feminist game. I also discovered that unnatural, man-made materials are much easier to develop to a realistic standard having less intense normal maps then that of organic materials such as wood or stone.

The level would consist of stealth aspects giving the players a slight challenge which will make it more entertaining for them. However, I would like to have the entire scene created to its best standard before game play is implemented. This quality over quantity approach will make the scene overall rather small or at least medium size in scale but the project itself will be quite big.

Phase 2:

The group I have chosen had a similar idea to the Sci-fi landing pad product that I had proposed. However, they added a more worn down feel to the materials of the scene adding grime and making most of the materials an off-white colour to add realism and usage to them which can be seen in references such as Portal 2, Destiny and Star Wars.

Image result for destiny russia

Phase 3:

So far we have been focusing our efforts on the essential documentation for the Pre-production of the product. I have expanded on the production schedule I had made before as well as creating a Team Contract and setting up the Teams communication channels.

production schedule

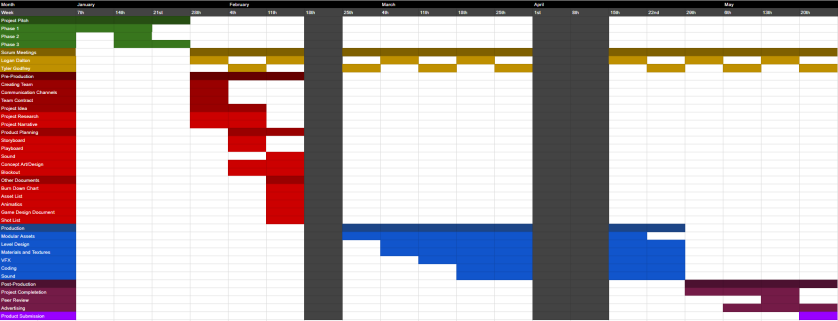
I have expanded the Production Schedule for it to mention more of the tasks as well as displaying the schedule for the teams scrum meetings and who will host them on each week. The production schedule is divided into each phase of the project using colour coding to clearly represent them as well as detailing the continuous updating of the scrum document.

Production Schedule

Red

The red section of the production schedule details the pre-production of the project. The pre-production schedule included: Creating a team and the necessary communications and documents for the team as well as beginning to research, plan and concept for our project.

blue

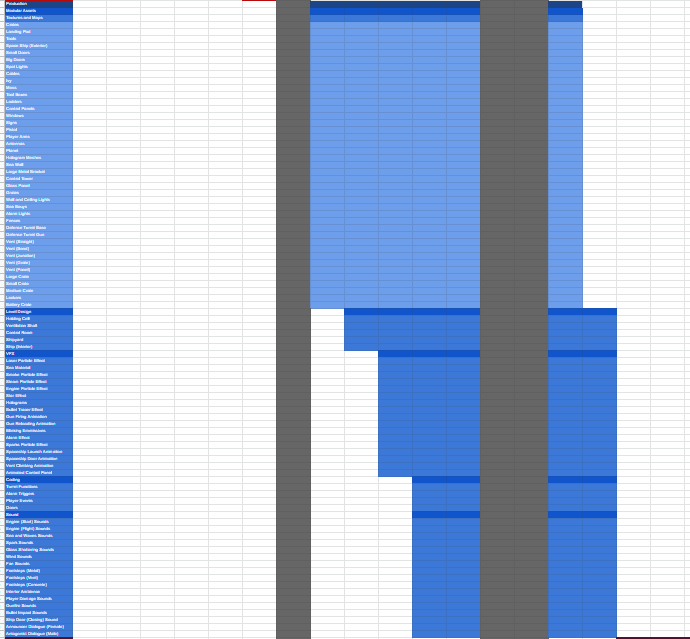
Taking up a large chunk of the production schedule is the production phase of the project in blue. The production section of the production schedule details key parts of the project we must complete, those being the Modular assets, Level design, VfX, Coding and Sound. After which it details each individual asset under their respective key and how long they are presumed to take.

Purple

The purple section of the Production schedule establishes the post-production and end of the project. The post-production details the section of time we have to finalize our work as well as begin creating advertising methods for the game such as the game cover and trailer.

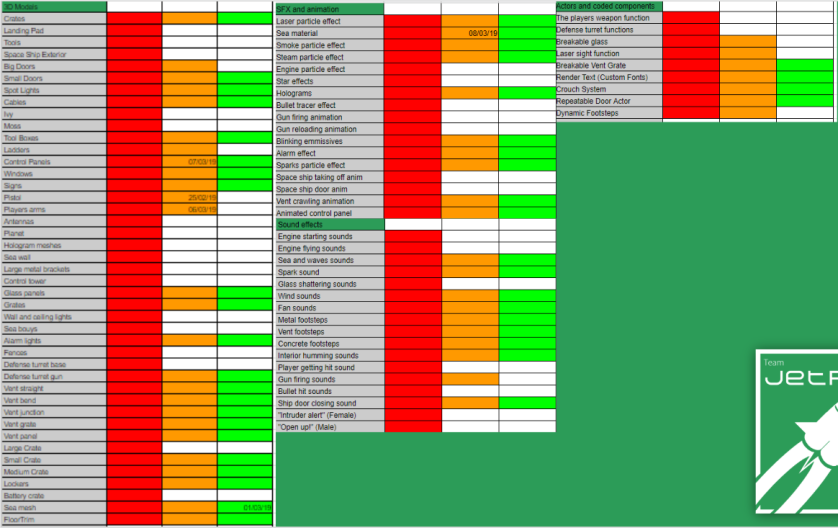
Along with the production schedule we began to create an Asset list for our project which would detail each asset required and whether it was completed or not. This was regularly updated and worked in unison with the Trello page to help the team establish which assets had yet to be completed.

Asset.PNG

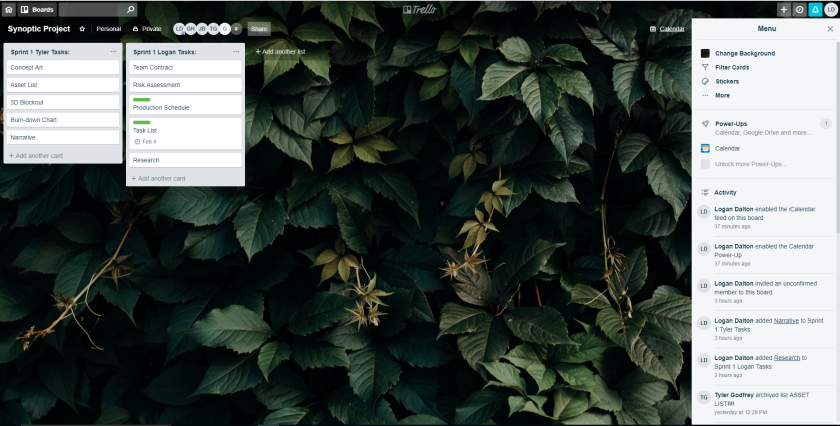
The team has decided to use both Trello and Padlet in order to communicate both of which we have set up for use as well as Scrum meetings which will be held once a week. We will also use Trello to note down what we discuss within our scrum meetings and make sure that each team member is completing their allocated tasks.

Trello Page

The team created a Trello page to be regularly updated allowing us all to communicate what had been done and what hadn’t been done yet.  This method allowed the team to appropriately manage their time and focus their efforts on things that had much more priority.

Padlet Page

The padlet was made for the group to communicate what they think should be added to the project and links to tutorials that detail how to make assets. The padlet was often updated and organised to make it as clear as possible for the team.

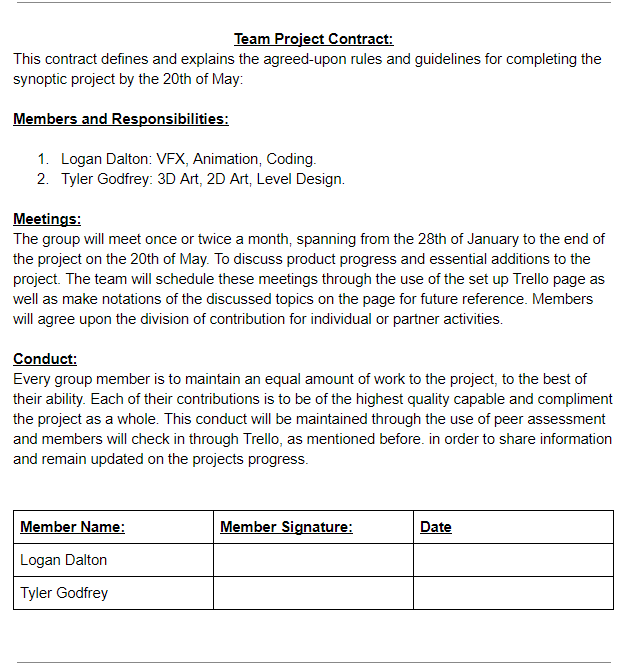
Our Team contract details what each of the team members jobs will be within the project as well as the consequences of not contributing to the product.

Team Contract


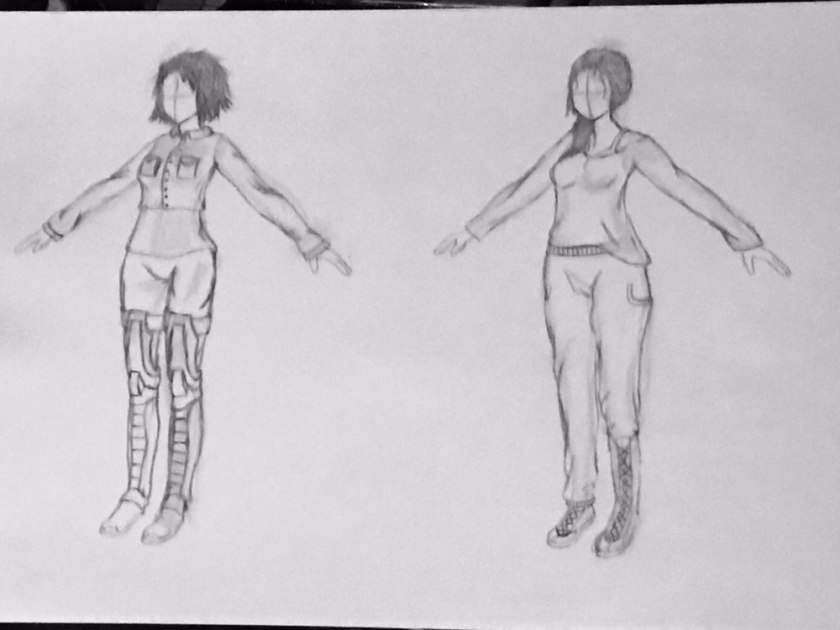
Once we had the essential documents out of the way we began to focus our efforts on the concepts, block-outs and assets. I specifically did work on the character concept art to give us an idea of how the protagonist will be portrayed. Producing a variety of different concepts which we then improved with digital art. Furthermore we developed a storyboard and play board to get a better understanding of the games narrative.

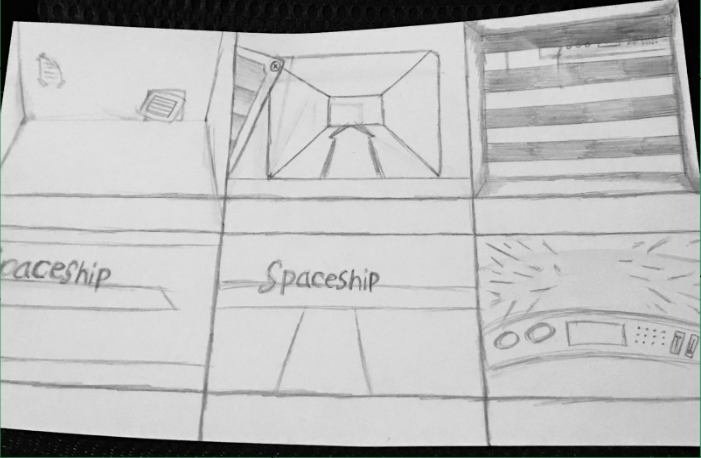
Storyboard

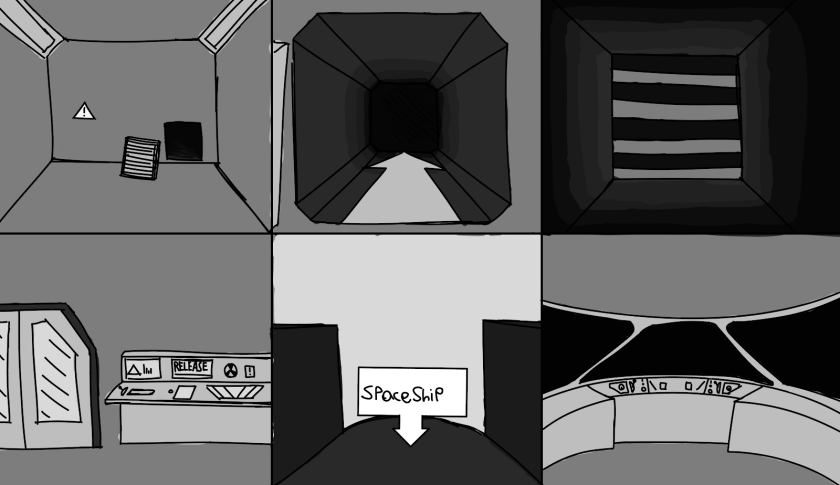
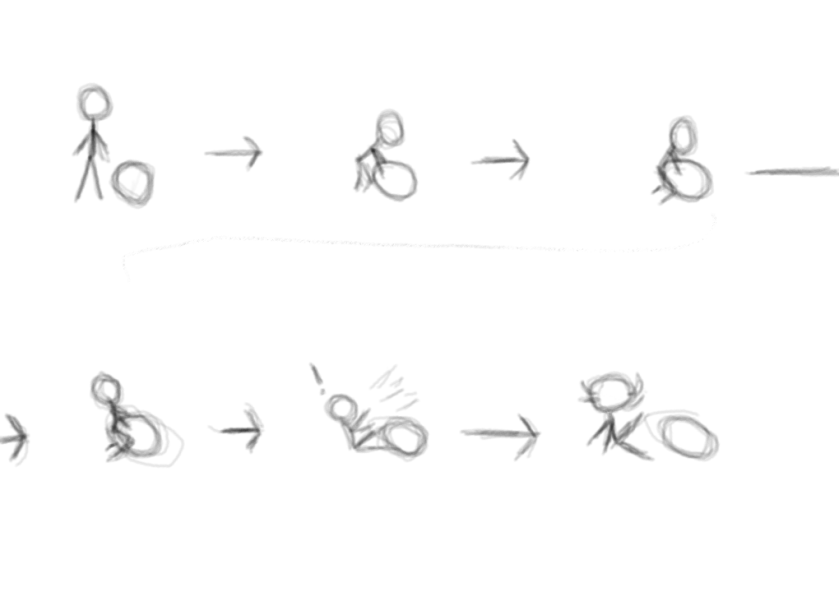
Originally the storyboard is drawn traditionally by me, giving an idea of the games overall narrative though it is subject to change later in the project if we have to. The storyboard illustrates the player spawning in the room and finding their exit through a vent way which brings them out to a control room leading to a spaceship hangar where the player escapes the facility. After being drawn traditionally the storyboard was redeveloped in a digital style to appear more professional.

DSigitalStoryboard

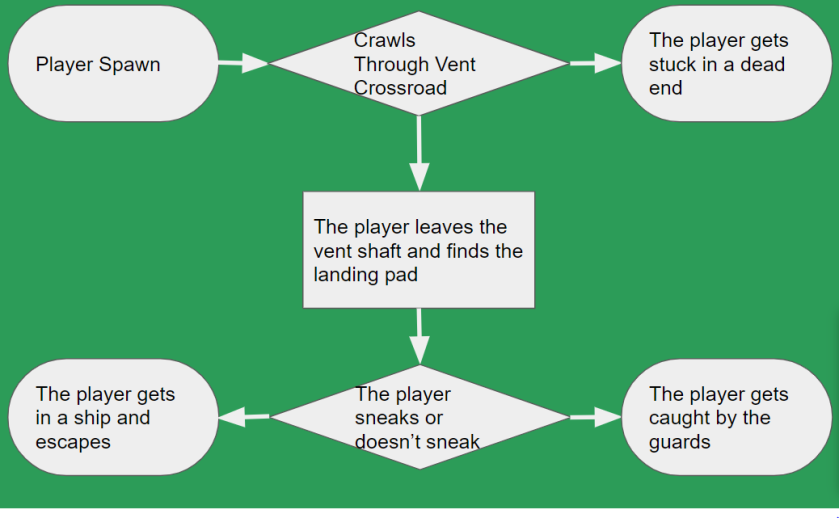
In addition to the storyboard. We created a play board explaining the different paths and results of the players decisions within the level. This adds to the narrative of the game and creates a more playable experience for the consumer.

Playboard


Concept 2

Originally the team developed 3 concepts for the player character. Taking inspiration from other protagonists in Science Fiction games such as Fate from Mirrors edge, Nilin from Remember Me and Chell from the Portal series as well as taking into consideration what look would be more suited and practical for the character such as military and industrial attire.

Eventually we settled on a final design for the character which was drawn in both a standard pose and dynamic pose by me. Both of which were then sent into Photoshop to be developed into a digital illustration of the character.

Niablank

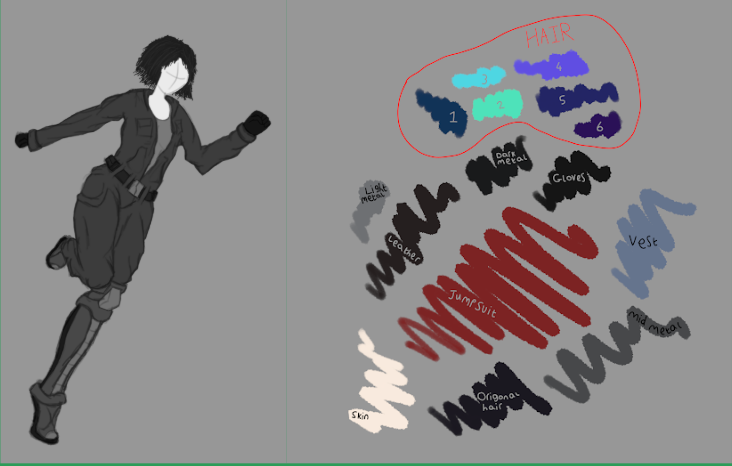
At the beginning of turning the character art into a digital style we created a monotone version of her along with the proposed colour swatches used to create the final product. Then the character could be filled in with the final colours.

NiaColours

The team began to explore a variety of colour schemes and palettes for the protagonist this exploration of colours allowed the team to decide which style would work best for the character, ultimately deciding on the original red idea.

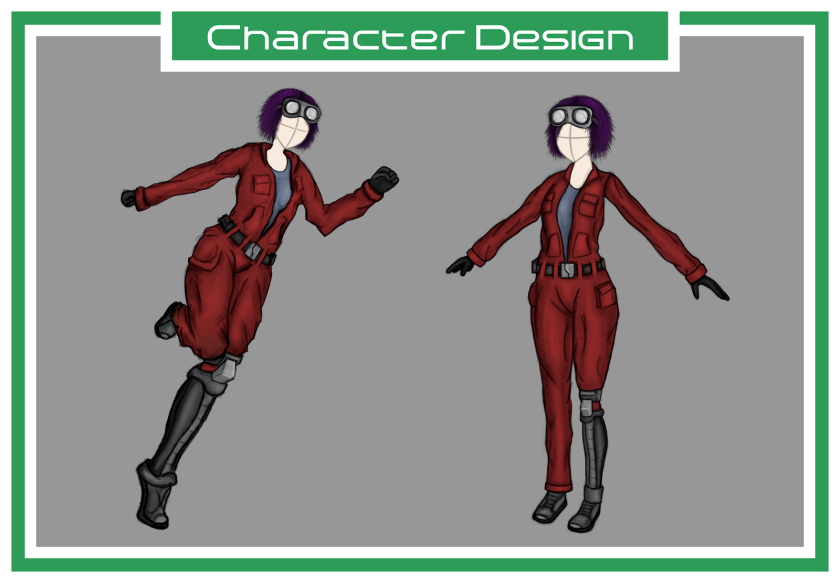
BigNi

This is the final product of the character concept art after drawing the model traditionally and colouring her digitally.

I have also gathered a few sound examples similar to the kinds of sound effects we are hoping to put in our game.

Image2

As part of my role as the VFX artist for my team, I have collected some real world references of the assets we plan to include.

Image5.png

Production:

In the first week of the production I started working on the VFX we are likely to use often, these being the Localized Volumetric Fog and the Dust particles as they were to be used often in the vents of the level to create a dusty and cloudy effect.

  • Localized Volumetric Fog

This particle effect was created to replicate the volumetric fog feature in Unreal Engine 4 without having the entire level foggy. This would make it so the corridor and bedrooms weren’t foggy at all, however the vent shafts would contain dense fog. This was crucial to the look of the vents as the fog would reduce the players vision making the vents seem ominous.

The material uses a sphere mask to condense the fog into one localized area which is then set in the particle editor. Initially we had some trouble with this effect as the fog would not appear with in the level though we spent a lot of time in the material and particle editor looking for a solution, we found it was due to using volumetric fog within our level rather then exponential.

Localised Fog

  • Dust Particles

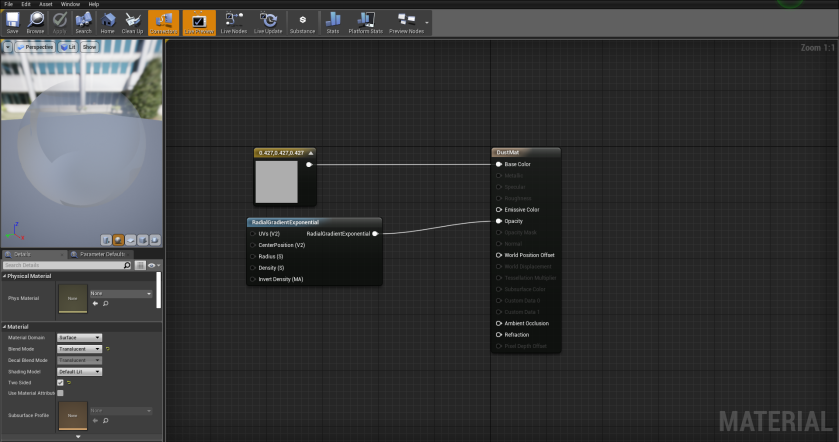
The dust particles use a rather simple material texture to create the little spores which are then put into a particle system to have multiple float around, we also edited the particle to have them fade in and out rather then blink in and out of the scene to make the spawning less noticeable.

Dust

After the first week of the production phase was over I had finished the Dust and Fog VFX and so began to work on creating the ocean material of the project as it was a much larger asset to work on.

  • Ocean Material

The ocean uses a custom made mesh of a plane model which has been subdivided to allow the engine to effectively displace portions of the mesh without ruining the appeal and maintaining a realistic look.

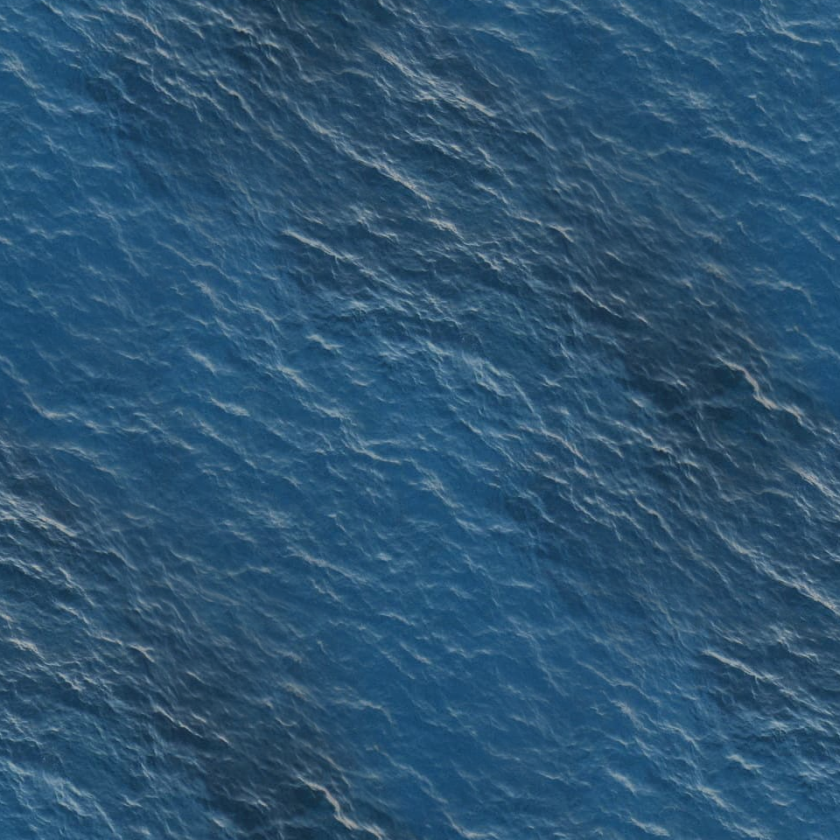
The ocean material also uses a few different UV inputs. These are made from two different ocean textures. The first is of a basic sea.

OceanBase_01.png

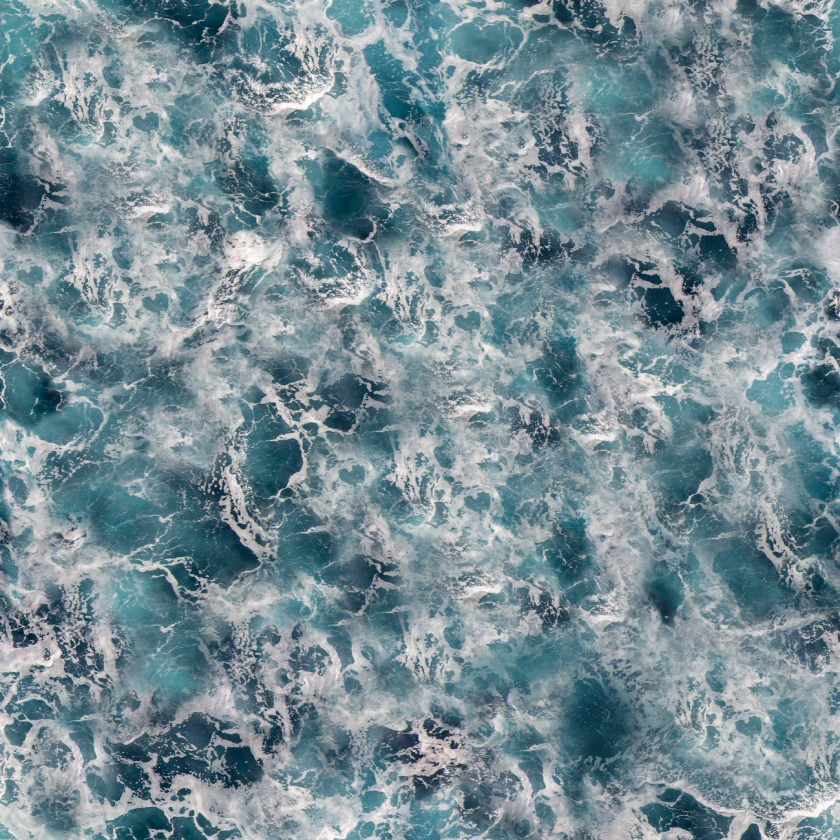
The second is of sea foam.

OceanFoam_01.png

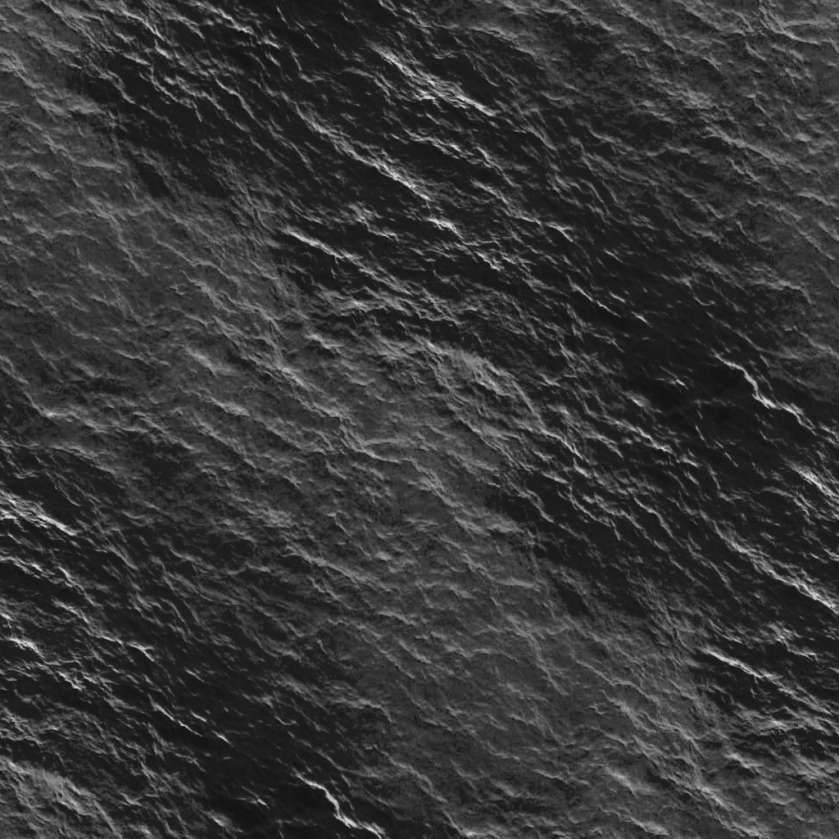
Both textures are then turned into grey scale bump maps.OceanBase_01_BUM.png

OceanFoam_01_BUM.png

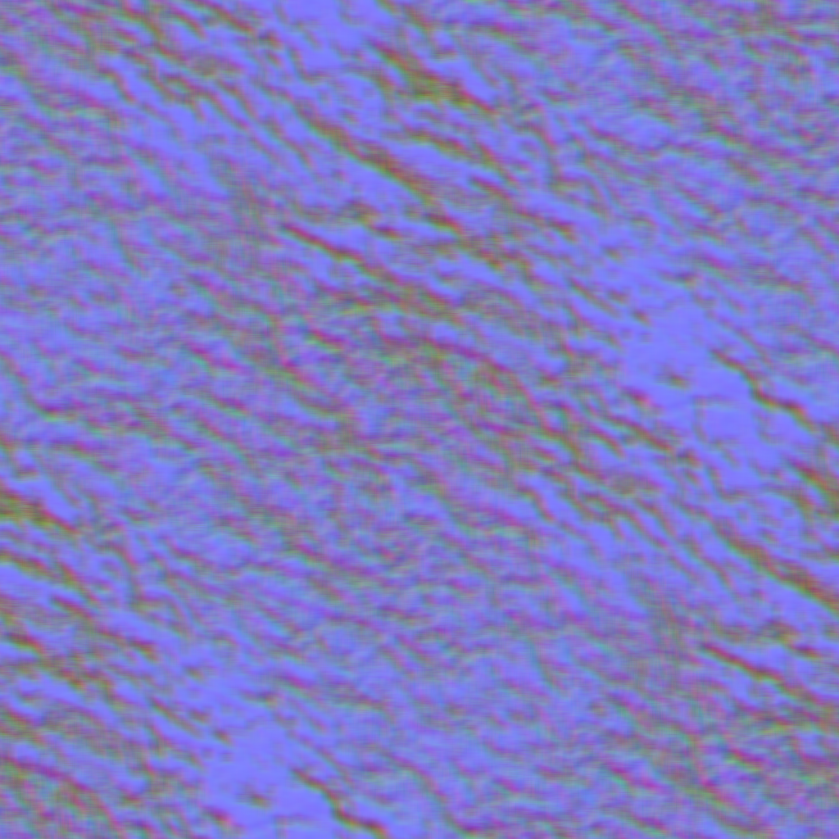
And are then finally transformed into normal maps using Photoshop.

OceanBase_01_NOR.png

OceanFoam_01_NOR.png

The Ocean uses a complicated material function which uses world displacement in a sine/cosine motion using RGB to determine the movement direction of the waves on each axis (Though B is disabled)

OceanFunction

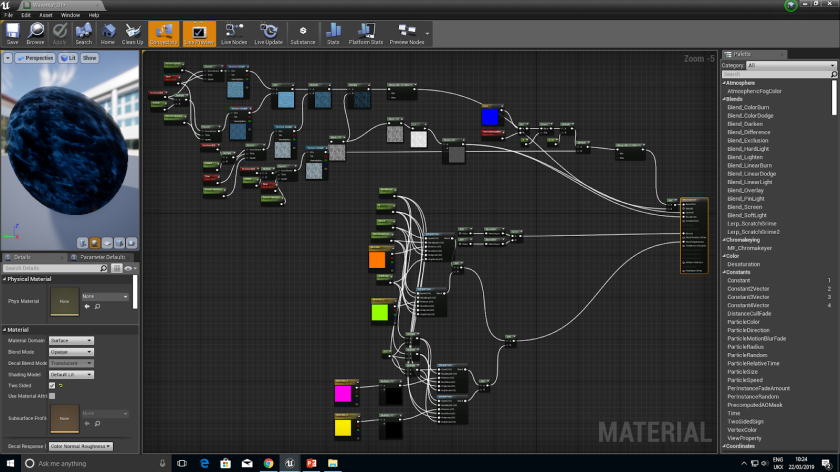
Once the wave movement of the ocean was created we began to work on the texturing of the ocean. Texturing the ocean caused a large delay in the development of the material as we tried a variety of different methods including making the ocean transparent or adding depth fade to emulate the foam appropriately until we eventually found a solution. The ocean uses three different textures which are set to slowly pan over each other to create the base colour. Furthermore, after inverting the colours of an R masked foam texture we were able to use the product as the oceans specular and roughness map

OceanMaterial

HirezOcean

Though the ocean material was never added to the final level. It is still a very compelling effect and would have given the game a lot of atmosphere had it been added to the project. Furthermore, its creation provided greater insight into the material editor and material instances.

Due to delays caused by the ocean material as well as other projects in our course. The ocean hadn’t been completed until the 5th week of the production phase. However, once it was finalized I quickly began to work on the other VFX assets.

  • Lasers

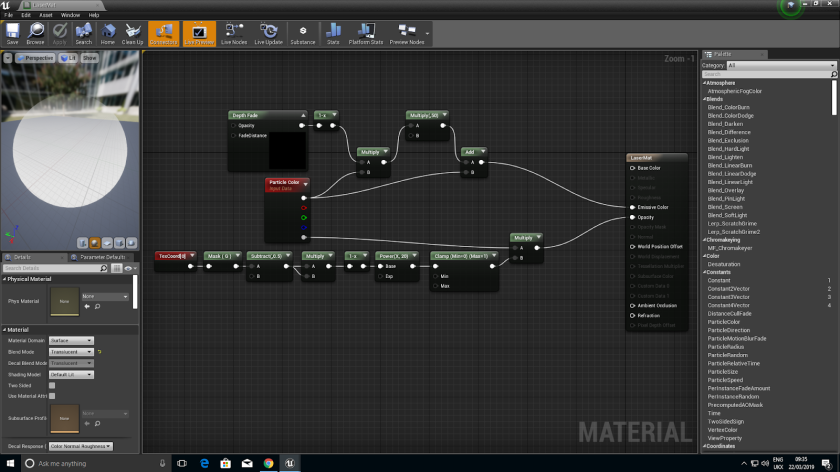
This particle effect was intended to be shot from the players handgun as well as the enemy guns which fired at the player. The laser uses an emissive material which is assigned to travel from a start point to a target in the particle editor similar to a laser bullet. However, due to neither the gun or turret making it into the game the laser was also removed from the level.

Laser

  • Sparks

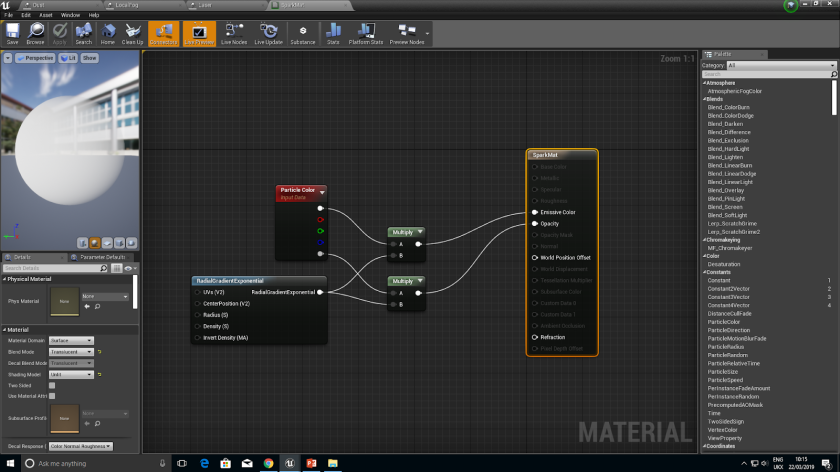
The sparks use a similar material to the Dust creating small dots. However, unlike the dust the sparks are also emissive. In the particle editor we added collisions to have the sparks bounce off of the floor as well as added light to them. We also created a separate version of sparks which changes the lifetime to have them come out in spouts rather then pouring out continuously. The spouting particles added the obstacle of making sure the sound effect turns off and on at the same time as the sparks spouting and so we were forced to make a note of the time in between each spout.

Sparks

  • Smoke

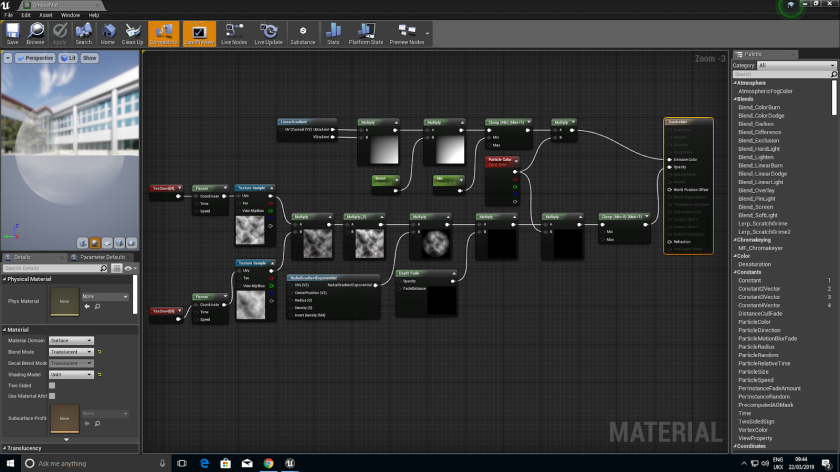
This smoke is an advancement upon the smoke I had created for Imagined Worlds since the smoke doesn’t have jagged edges or noticeable repeating textures. The new smoke looks 3D and as if it dissipates into the air rather than a series of sprites fading out into transparency ultimately appearing much more dynamic than my old smoke.

This smoke can also change colour and opacity to create different effects. So the smoke can look thick and dense or be lighter and look more like steam.

Smoke

The Smoke, Laser and Sparks all managed to be completed in the 6th week of the project. These VFX were assets that had quite a high priority in the project but may not necessarily be used often within the project. With the more important VFX completed I began to work on the less essential or easier to make assets for the remaining 3 weeks of the production phase.

  • RGB Split VHS effect

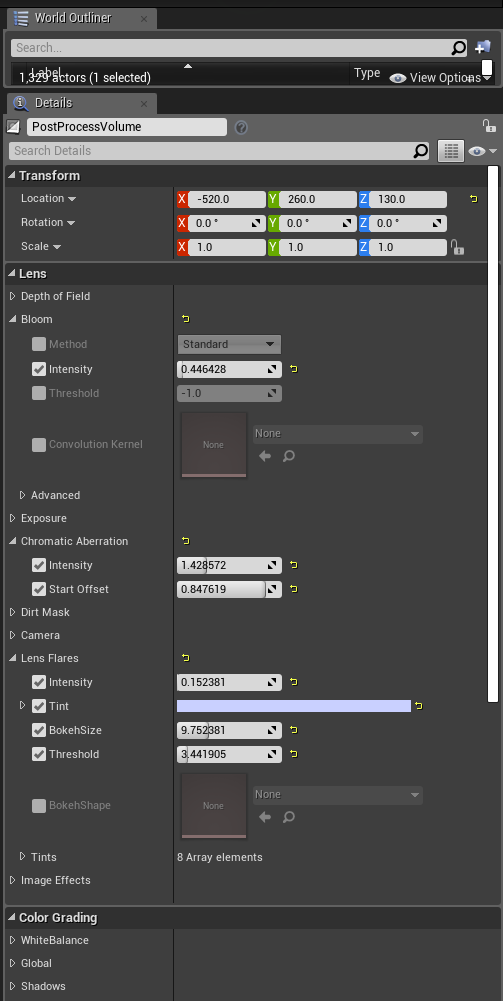
In the project we added a slight VHS effect to the camera. creating a slight RGB split effect at the edge of the screen by altering the chromatic aberration. We also added Lens Flare and Bloom to make the scene appear brighter and look overall more like a science fiction level. While it was a small effect it made an interesting addition to the project.

RGBSplit

RGBSplitEx

  • Hologram Material

This material was created to replicate a holographic effect. It is instanced and so can can be customized in terms of strobe speed, colour and opacity.

The Hologram material uses a texture of vertically panning lines which are used for the opacity of the material as well as world displacement to send a ripple through the material. Originally these black and white line textures were causing a problem where rather than appearing as multiple little lines would appears as large, thick lines causing the Hologram to become entirely transparent. This problem was eventually solved by using a different method to create them, removing the component mask and Cosine nodes used to make them before.

During the creation of the Hologram material I also decided to play around with fuzzy shading in the material. While it wasn’t applied to the Hologram material or used in the project it was enlightening to try out.

Hologram

  • Interior Water:

This material was created to contrast with the ocean material. As a more applicable alternative which could have more possible uses. The idea for this was to have areas of the level cut off by water which was electrified and damaged the player.

The material uses transparency and movement of normal maps on a plane to create small waves of water without actually moving the plane via world displacement like the Ocean. We also attempted to implement this effect into Ocean material to add to the look of the waves however it caused a large error with in the texturing and so we removed it.

Unfortunately, the interior water material didn’t find its way into the final product.

IndoorWater

  • Glitch Effect

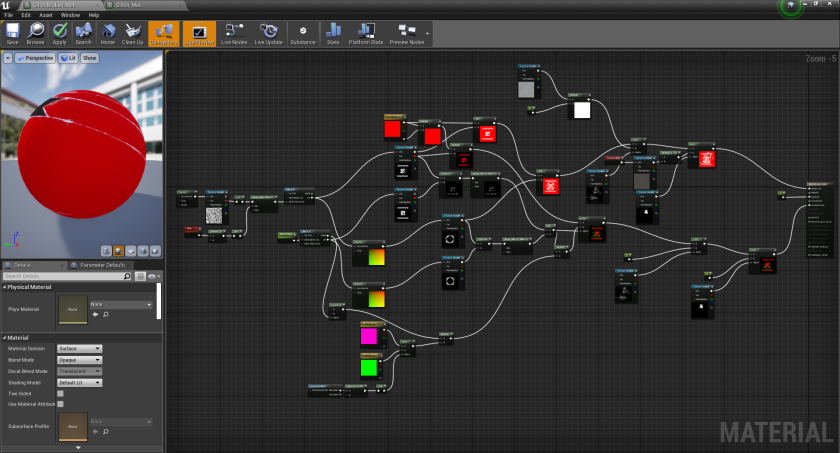
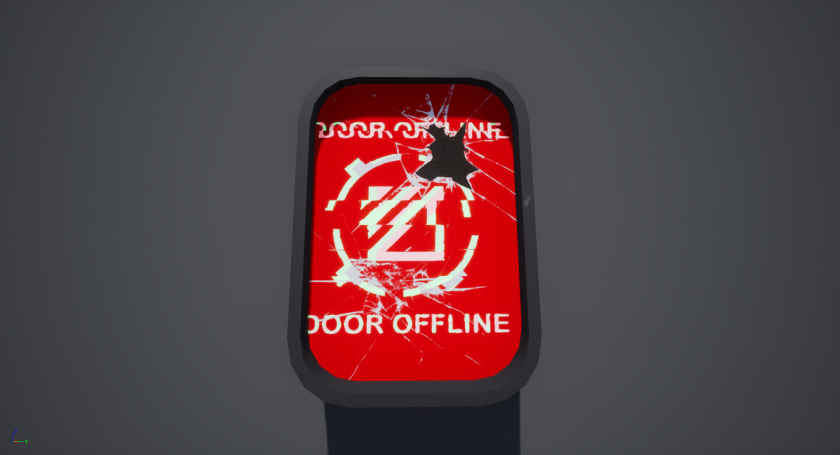
This material was created to create exposition within the scene by having the doors labelled in order to indicate which doors the player can open. The door buttons use an animated material texture which is instanced to allow the user to edit the colour and functionality of the door. The button also has a custom material function which distorts and adds noise to the button to create a broken effect to the material, this can also edited or turned off in the material instance. In addition, we also created a version of the button material in which the door button is shattered and broken.

BrokeButtonBP.png

BrokeButton

  • Glass Material

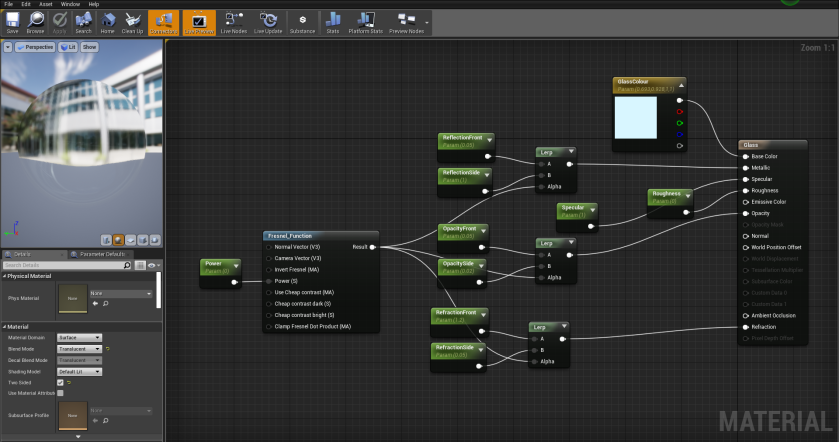
This glass material was created to be used in windows and the glass panes in the double doors. It has refractive and reflective properties which makes it more realistic as well as being transparent. The glass was also made into a Material instance allowing the user to change how reflective or clear the glass and even add colour to make the glass appear tinted.

Glass

During the final week of production I began to import the assets we were using from the imagined worlds project as well as work on the door code once I was able to download their finalized meshes.

  • Alarm Actor

This alarm animated light was an adapted and redesigned effect from our Imagined Worlds project.

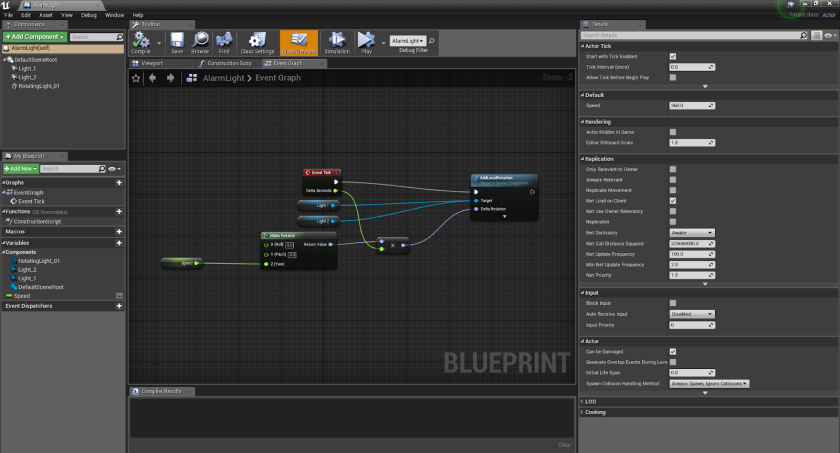
The actor is rather simplistic, featuring two spot lights of a red colour which are set to rotate. However, it id create the issue of having the material texture rotate at the same speed as the lights.

AlarmBP

  • Flickering Light Function

This flickering light system is used a lot in the project from the flares, the sparks and malfunctioning lights. It’s properties can also be utilized in other materials to allow certain lights and buttons to blink on and off.

LightFunction

  • Opening Door Code

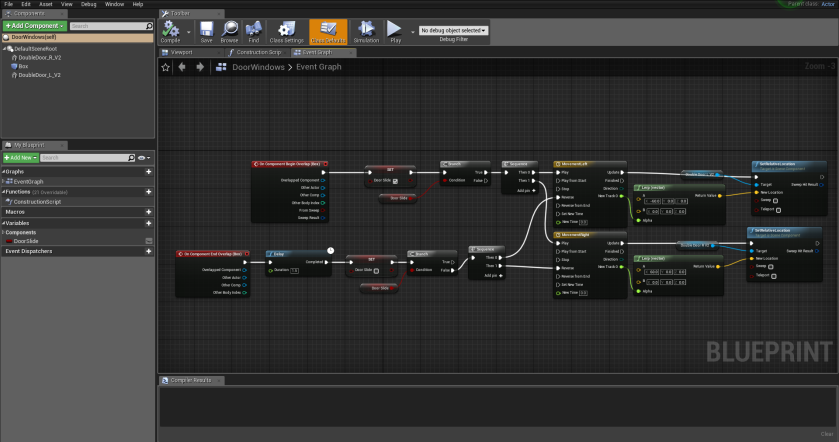
The door code was essential to the project to allow the player to travel through the doors to different rooms. With two different doors in the project I created code to have the doors open by moving upwards or to the sides. Both examples of code taking action when the player enters an area in front of the doors as well as closing once the player leaves the area.

DoorBP

Decal Sheet Material

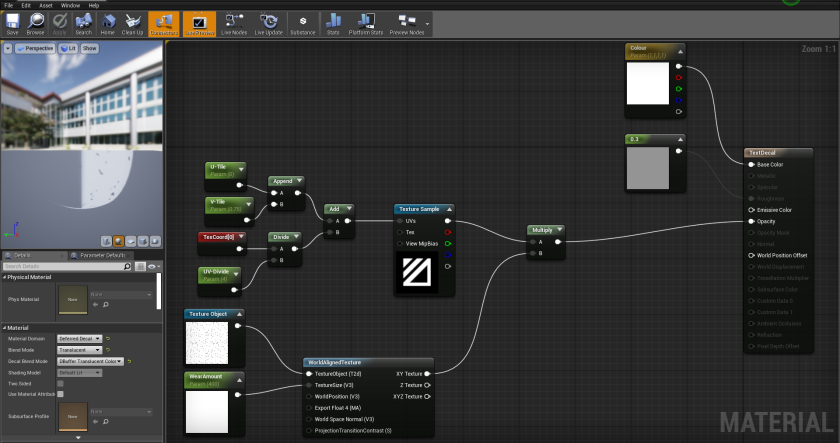
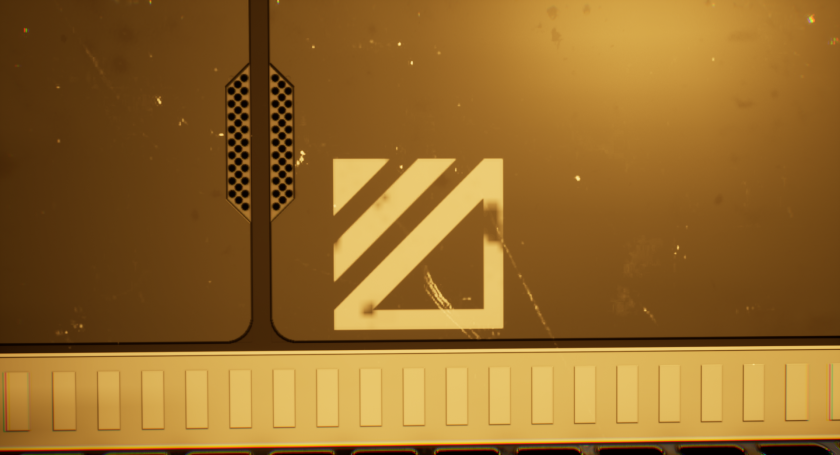
I created a black and white texture with many decals on it and I had been given the job of making its material in Unreal only display only one decal at a time. I did this using a texture coordinate system and parameters to control the U and V axis separately. The material is then converted into a material instance so that it can be customized in real time without always changing the basic material.

DecalSheet_03.png

Image1.png

ScreenShot00175

I also worked on several of the sound effects for the project.

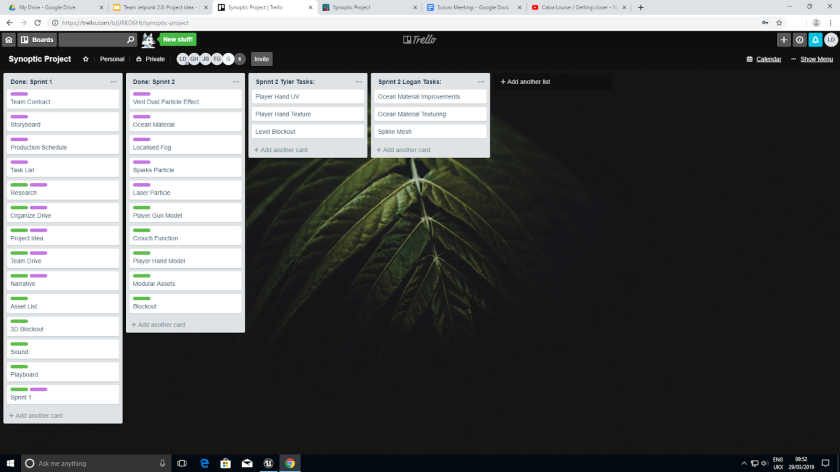
Throughout the production phase we updated our Trello to note what had and hadn’t been completed in time allowing the team to communicate if assets had been delayed. The Trello was divided into tasks that needed to be done by each individual member and completed tasks which would be colour coded to show who had completed them. By the end of the project I had completed the majority of assets detailed on the teams asset list that were mine to create. Although I didn’t get to some of the mentioned assets, the once I hadn’t done had either been removed from the project or were extremely minor to it. In reference to the established team production schedule, I was unable to stick to its suggested time schedule due to delays caused by errors in some of the VFX. 

UpdatedTrello

In Unreal, I was in charge of all of the sound effects, both diegetic and non-diegetic sounds. I will also work on the sound for the fly through in the post-production.

Image3

For sound in the project we have gathered sound for the doors, alarms, ocean and scanners for our collection of diegetic sound. We also plan to add more such as footsteps and heavy breathing of the protagonist character. Furthermore, in order to build a horror atmosphere with in the game we plan to add non-diegetic ambient sound to create a chilling feel to the level overall.

Throughout the project our group was able to effectively develop normal maps without going through the process of high to low poly or vice versa. This allowed us to create textures and materials much faster in comparison to what it would had we used the high to low poly method.

Post-Production:

Approaching the post production phase of our project, our group decided to create the level with a Sci-Fi Horror genre rather than exclusively Sci-Fi as it allows to showcase a narrative much more effectively than if it was exclusively Sci-Fi.

GameCoverConcept

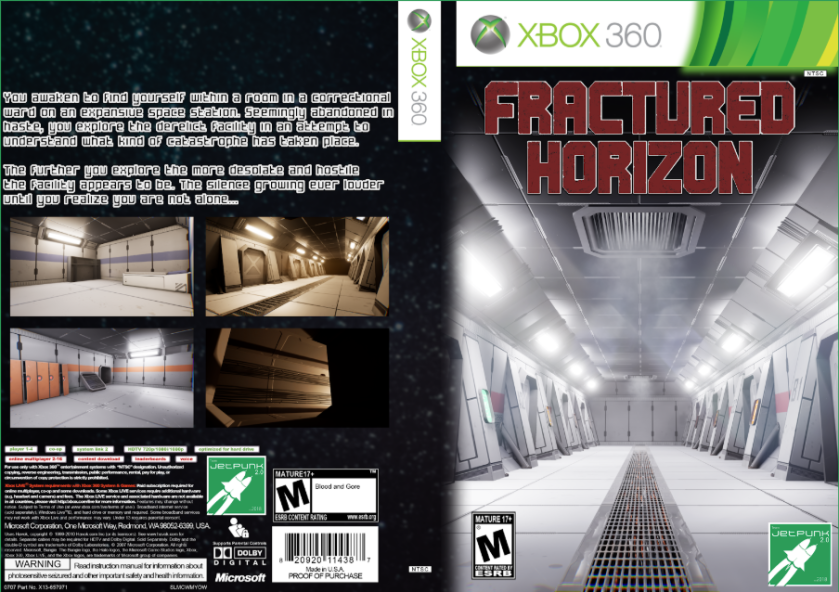
The game covers initial concept featured a shot from behind the protagonist in an over the shoulder pose looking to the camera causing them to engage with the audience directly and thus draw them in. However, The team felt this approach to the game cover didn’t appropriately showcase the games features and genre and rather than using custom art we decided to use an in game shot as the cover instead.

GameCover

As well as the front of the game cover. The back features a description of the game which addresses and directly targets the audience creating a personal effect to it, using vague and mysterious descriptions along with ending on a cliffhanger, the game description leaves the reader with intrigue, encouraging them to play the game for themselves.

The hind of the game cover also features snippets of the in game scenery to further intrigue and interest the character as well as official documentation used for the majority of games such as branding, copyright and age rating.

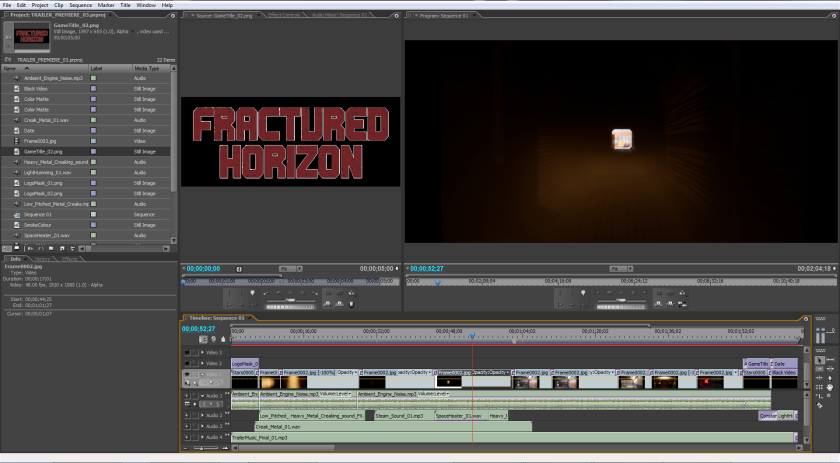
Along with the game cover we also developed a game trailer which I created and managed the sequencer for, collecting a fly through of each room of the project for the recording while our other group member developed a soundtrack for the trailer.

I rendered all the frames in the fly through and imported them into Adobe Premiere from wich I cut the video up and added the soundtrack to the trailer. I also worked on the composition and transitions between each shot.

Trailer_01


Imagined Worlds Evaluation

Introduction:

In the subject we had two projects in which we had to create a High and Low poly model of a historical item, This project was set to expand our knowledge and understanding in Modelling and expand our skill set. As well as create an interactive scene in a group, which was to give us knowledge in project management and planning as well; as give us experience in working in a group.

Project Idea’s:

In the solo project I chose to create the 3 iconic weapons belonging to the sons of Kronos, those being: Zeus’ Bolt, Hades’ Bident and Poseidons Trident. To create these models I researched multiple pronged spears as well as looked at Greco-Roman weapons to use as a reference. However, creating a mythological item gave me a lot of freedom in how I design them.

As for the Group project we chose to create a Cyberpunk Style Alleyway in which we used other Cyberpunk style scenes, majorly Bladerunner which is clear in the scene itself. To create this scene we first researched the Cyberpunk theme as a whole and then used the information we found to heavily inspire our project.

My time management of the project wasn’t great, prioritizing the group project in order to make up for work that other members wouldn’t/couldn’t provide to the project thus causing me to lose time to work on the solo project.

Development:

Beginning:

In the beginning of the group project we mostly focused on researching Cyberpunk as a theme and used the knowledge we found to expand the concept of our project eventually creating concept art and a block out of the alleyway.

In the solo project I first went to model Poseidons trident, being the most well known and thus having more reference material for me to compare it too and so I first created the low poly staff of the trident.

Middle:

Overtime the scene of the group project began to develop. Being blocked out and becoming what we wanted from it as we began to gradually import work such as my VFX and the models of the other group members causing the scene to.

As said before in my time management evaluation, my solo project didn’t get much focus and by the middle of it I had the complete low poly model of both the Trident and Bident as well as starting to UV the Trident.

End:

Ultimately the Group project came out extremely well. Positively showcasing our work and overall looking a lot better then we anticipated, my work specifically turned out really well especially taking into consideration my lack of experience in the VFX department. With me having made realistic fire effects as well as a variety of lighting and emissive effects and rain.

On the other hand, the solo project could’ve turned out a lot better, finishing the project with just a rather simplistically modelled but baked and textured Trident. The project overall did give me some more skills in modelling such as baking but ultimately my lack of time management had an extremely negative effect on it.

Problems:

The problems with each project mostly stemmed from the lack of work provided by others in the group project causing me to focus my work so that we could make up for the work they were not providing, causing me to lose time to work on the solo project.

Other problems also included mistakes such as the rain particle effect appearing more like snow being small and fat and falling quite slowly. However, thanks to some peer assessment from the group I was able to correct and improve the particle effect.

End:

Overall I am happy of the end result of my work despite the set back of time on my solo project I was able to finish to finish the project with at least something to show. On the other hand the final product for the Group project came out extremely well and I am proud of our success in the project despite its set back.


Portfolio Research

Concept Artist Portfolio: Siwoo Kim

The Concept Artists portfolio page is organised well and showcases a lot of the Artists work well, though the rest of the page itself does look rather bland. The Page shows she can produce a variety of different art following different themes and purposes. However, her about me page doesn’t go into very much detail about her aside for the very minor details such as her name and where she is from. It does go into some detail about her skills, past jobs, resume. etc: but it doesn’t go into as much detail as it could.

Varying Portfolio: Robby Leonardi

This portfolio showcases a variety of different talents such as Coding, Animating and Illustrating. The portfolio is unique and explains his talents and who he is to some extent displaying it as a game which also advertises him as hard working though some employers may find it as long and drawn out, discouraging them from completing the “game”.

Animator Portfolio: Jason Shum

The Animators Portfolio showcases a variety of animations and videos on animation tutorials presenting not only that he can create animations but also that he knows enough to teach others in it as well. He doesn’t have a page specifically for his about me instead leaving at the top of his portfolio. His about me doesn’t go into very much detail about his education and leaving at the top of his portfolio makes it easy to miss as the images and videos draw the employers attention away from it.


Imagine Worlds Blog Post

Pre-Project:

Before we started the project I contributed by helping the team in finding references and ideas and I also helped the team through their disagreements. Furthermore, I also helped them write the Project Pitch Proposal for our Imagine Worlds Project. We Originally planned to create an abandoned ball room however we decided that the ball room would be too empty and too large we also debated a Witch hunt scene or a Train station.

These are some of the references we used for the project.


As you can see our project is to create a Cyberpunk style Alleyway, when we came up with this idea their was a slight debate in the team about what kind of style Cyberpunk actually is which resolved eventually through the use of Google.


This is some concept art created by some of members of the team which we will also be using as a reference for the design of the level and scene.

Project

Currently for the project I have been practicing animation and creating particle effects and rain in Unreal 4 I am also waiting for the modelers of my group to finish their models so that I can animate them and add effects to them if needed.

Over the weeks of practicing different visual effects in unreal I have created a variety of particle effects and VFX including:

  • A Rain Particle effect
  • An AC with an animated texture for the fan and a Steam particle effect
  • Flickering lights, Police Lights and Emissive objects
  • A Sky dome that can be edited to suit the levels atmosphere

Post-Project

The end of the project came out with an extremely good end product, accurately presenting the theme and easy to identify by outside viewers. The project was a success despite the issues it had and I am proud that I could produce work suitable for the project.


Creative and Technical Modelling Project

Progress

I have progressed a fair amount in this course.

Originally I had never used Maya and I can now use Maya to Create, UV Map and Texture 3D Models.

I have learnt to use modelling tools such as Extrude or Smooth to create more accurate models as well as how to UV Map the models I create. Furthermore I can now create Colour, Bump and Normal maps using the created UV Map to texture the model making it appear more realistically and aesthetically pleasing.


Project Concepts

I have chosen to do historical models taking inspiration and references from old Greco-Roman style weapons, armours and other items this gives me more references to use and also gives me more freedom on what I model.

Pitch Concept 1:

My first idea is to create the three weapons often portrayed with the three sons of Kronos from Greek mythology. These being Zeus’s Aegis shield, Poseidon’s Trident and Hades’ Pitchfork.

This allows me to use references from other things the items might appear in as well as there base mythology while also giving me freedom in their design.


Pitch Concept 2:

My second idea is to create a Greco-Roman style guard barracks in which I would most likely create multiple simple weapons. For this project I could take reference from multiple things such as historical Greco-Roman weapons as well as models from games that also take inspiration from that time zone.


In both Concepts I would be using Maya to create the models as well as to UV Map what it is I choose to create as well as mudbox to add more complex details such as scratches, damage, engravings and other indentations which I will then bake into a lower poly model. I would also use Photoshop to create the Colour Map for my model.


Evaluation

To Evaluate my work I would most likely get unbiased peer reviews to give myself an outside perspective on my work and models as well as evaluating them myself by comparing them to references I use.


Time Plan

Time Plan

Project Research 

Project Progress

:TOP Week 1

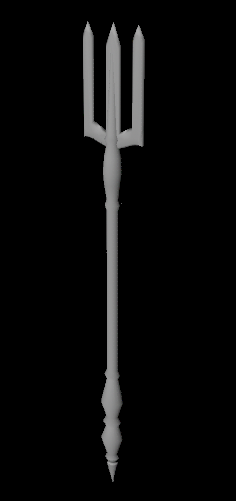
This is the model of the low poly Poseidon Trident which I created by extruding and smoothing different sections of the staff.

Bident

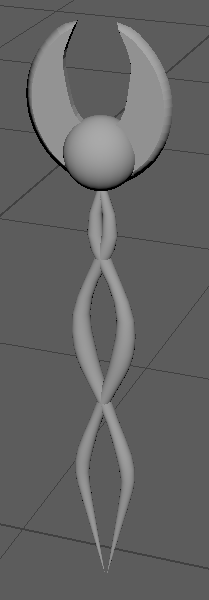
This is the low poly model of Hades’ Bident which I created by creating multiple edge loops and then using soft select to give the staff a more twisted shape and design

HBident

This is an updated version of the Hades Bident, I hadn’t changed much but enlarged the sphere in the center of it as well as removing parts of the blade that would overlap with the sphere.

Baking

We exported high poly Maya models into Mudbox where we could sculpt them in higher detail using the multiple different brushes, we then exported them back from Mudbox to Maya and baked the detailed, high poly model into the low poly model making it appear a lot more detailed then it actually is.

It is important to bake High Poly detail into Low poly models as it creates the illusion of detail while making the model easier for the computer to render. Low poly models are often used in real time rendering which is used in games and other interactive media as the computer must constantly render the scene to suit everything the user does. While High poly is used in pre-rendering, where the scene cannot be changed making an is already rendered which is usually used for cinematic’s and movies.

High and Low Poly

When a model is low poly it means it has a low number of poly’s and usually a low level of detail. Alternatively, a high poly model has a high number of poly’s and a high level of detail. However to many high poly models can cause an engine to lag and maybe even crash so most models are low poly models with high detail textures which can be produced by Baking.

LowPol tree

Here is an Example of some low poly models which clearly have low levels of detail however they will also be easier on the software to render and take up less space. Low poly models can be given more detail by adding things such as normal maps or baking High poly models into Low poly textures.

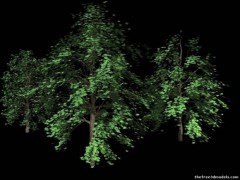
HighPol Tree

Here is an example of a high poly tree which has higher levels of detail and looks a lot better then the low poly however rendering these will take longer for the software to do and may even crash the system. High poly models can be sculpted to have even more detail which can then be baked into low poly models to give the a more detailed texture